When I Was Diagnosed With Ulcerative Colitis

Good Times

Over a decade ago I realized my eating patterns, lack of exercise, and long work hours was a problem. In fairness, this conclusion came because my physician at the time thought it would be a good idea for me to start taking blood pressure and cholesterol medication in my mid 20s.

“Is there anything else I could do?” I asked. He said “Well, diet and exercise.” I thought for a few moments and noted “OK, I’d like to do that.” I could tell he wasn’t a fan of my response but agreed stating that if numbers didn’t get better in 6 months he’d like me to start the medications.

I cut out soda, started to pay attention to serving sizes, and found some exercise that I could enjoy (simple recreational bicycling). Just 6 months in and I had visibly lost weight and the tests showed my blood pressure and cholesterol were in good shape.

“No one actually makes diet or exercise changes, that’s why I wasn’t hopeful anything would change.” stated my doctor. We were both happy with the result and no medication was needed. It really was a positive feeling and kicked off a journey to see how I could get even healthier.

Over the next couple years I worked hard modifying my diet, increasing exercise, and getting my life/work balance in check. I slowly lost weight and gained some muscle. At some point I hit a plateau but I was happy where I was. I took up Muay Thai, cycled to work most days, things were great….until I started to have this pain I couldn’t really explain.

It Hurts When I …

It was weird. Very weird. The pain was in my back, but on the side. Deep inside but near the edge. Maybe my hip? As you can imagine it was tough to describe. Here is roughly what was assumed before some kind of intestinal issue was looked at:

  • Stomach infection
  • Herniated disc
  • Kidney stones
  • Hernia
  • Reproductive issues (seriously…)

During this time I started to rapidly lose healthy weight and muscle. I had dropped from a good body composition in the 170s down to 150s.

Then came the referral to a GI specialist. After getting scoped it was apparent I had ulcerative colitis. The news came about a week after the procedure. Hearing the words Ulcerative Colitis was scary as this was something I had never heard of before. The nurse practitioner was extremely helpful and kept me calm while explaining the diagnosis. At the time she decided to start me on a medicine called Lialda (Mesalamine).

Did It Work?

Heck yeah it did! I took 2 monster pills every morning. The result was less pain and less running to the bathroom. Though it started to be less effective after about a year. We bumped it up untill we maxed out the dosage and things once again got better but then started to get worse. Like way worse.

It Can Always Be Worse

I started running to the bathroom more often…and I mean running. It went from 5-7 times a day to multiple times an hour. Of course this kept me from going places for fear of not getting to a bathroom in time in public (which happened by the way…). I started to have very little energy and weight continued to fall off even though my diet didn’t change (though exercise was less). I went from lean 150s to 130s. For my body this meant my ribs and sternum were visible at all times and I was able to fully grab hold of my ribcage from underneath. That’s not good.

Obviously Lialda wasn’t cutting it anymore.

Quick Aside

It may sound silly but I was very worried people would discount the work I did to go from just under 300 pounds to 170 thinking it was because of my condition. I knew I had put in a lot of time and work to get my weight down and my health up. This, in part, was one reason I didn’t share what I had gone through with many people.

Stronger Drugs

After speaking with my awesome nurse practitioner we decided to look at 6mp (Mercaptopurine). Before starting 6mp it was important for me to get more tests done to ensure I was healthy enough to handle the side effects. It was here a test found something strange while x-raying my chest.

“Do you smoke Mr. Milner?’

“I’ve never smoked anything. Why?”

“OK, we need to do some more scans.”

I came back another day and they scanned with another kind of machine (CT I believe). They noted they can see pretty big spots in my lungs. Well, switching meds wasn’t an option until these spots get figured out. Spots became masses. 3 to be specific.

Let’s Take A Closer Look

Here is a quick explanation of what came next. Another contrast CT. Next came a needle biopsy through my back to get to the lung. Then came surgery to remove a portion of the mass for review as nothing so far could explain what these masses were. During this time cancer was an expected possibility. Thankfully after the surgery (and a few weeks waiting on Mayo Clinic) it was found to be a rare condition called BOOP.

I had the BOOP.

Seriously. Sounds like something a clown catches.

I was immediately taken off Lialda and put on a massive amount of Prednisone. 60mg a day for a while and then taper down for 6 months. That did resolve the BOOP and “helped” with the UC. After that I was able to switch to 6mp without issue.

Now

I still take 6mp and it really does seem to help. It’s not a miracle drug but it’s still something I’m happy is available. It would be insincere to say that I don’t have pain daily. Some days I’m beyond exhausted. Anemia comes and goes. Arthritis? Yeah, especially in weather changes.

But with all that I’m still in a way better place than before! The Internet had been a super helpful place to learn about what helps others with the condition. For me these items have been quite helpful:

  • Taking the medicines prescribed 🙂
  • Hot epsom salt baths
  • Mediation and/or de-stressing
  • Limiting or eliminating caffeine and alcohol
  • Reducing usable carb intake (a surprising but effective positive change for me)
  • Exercise

Today I Moved to Silverblue

Today I took the plunge replacing my aging Fedora 26 install with Fedora Silverblue. What is Silverblue you ask?

Silverblue is the new face of Fedora Atomic Workstation from Project Atomic. With good support for container-focused workflows, this variant of Fedora Workstation targets developer communities. If you want to emphasize that it is part of the Fedora project, calling it Fedora Silverblue is fine, too.

Source: https://docs.teamsilverblue.org/

giphy

As a long time member of Project Atomic I had always wanted to use Atomic Workstation for my work laptop. I was keenly aware of the advantages of using an ostree based system on servers and it only made sense to use the same technology locally. However, time generally kept me from making the change. Switching to Atomic Workstation was always the 3rd or 4th thing on my TODO list. Today there was time.

Step 1: Backing Up

Technically speaking, one should be able to install an operating system without the need to back up everything up. However, if backups don’t happen and something goes wrong you’re going to have a bad time. Today I spent multiple hours combing through my home directory looking for things that must be backed up just in case. After finding everything required and placing it on local removable encrypted disk I moved on to step 2.

Step 2: Creating the Media

I grabbed the ISO from the Silverblue site and created the media the old school way. The instructions on the download page are great and I’m sure they work fine, but I’m so used to using dd for media copies I just went with that:

$ sudo dd if=Fedora-AtomicWorkstation-ostree-x86_64-28-1.1.iso of=/dev/sdb

Warning: If you do end up using dd make double sure your output file (of=) is pointed at the disk you are expecting!!!

Step 3: Install

And here is where the excitement for me really began. The official installation guide is quite good. I ended up following the manual partition instructions as it was similar to how I normally install vanilla Fedora. I set up my disks, and kept my old /home partition and mounting it to /var/home per instructions. The only additional thing I did that wasn’t in the instructions was I went into the Network & Host Name where I connected to WiFi and changed my host name before clicking Begin Installation.

Boom

img_20180706_123733520797202021912045-e1530902678123.jpg

This gave me some anxiety because at this point I had blown away my root partition so I didn’t really have a workable system to use if the installation didn’t work. So I did what any sane person would do and I decided to reboot and try again.

Second time’s the charm

This time I followed the same pattern except I didn’t connect to WiFi. I did still set my host name though. Installation went without a hitch and within about 7 minutes it was time to reboot into my new system.

Step 4: Initial Set Up

The machine rebooted, I unlock my encrypted partition, and everything looks good. A greeter popped up to set up a user, etc.. Everything you expect from a modern GNU/Linux system occurred. I figured this is the best time to update the system to the newest image so I drop to a terminal and execute:

# rpm-ostree upgrade

For whatever reason pulling the update ended up being slow. Really slow. After 25 minutes the update exited with failure. I tried adding –check just to make sure there was literally an update, and it failed as well. For the heck of it I rebooted and did it again and upgrading succeeded. Again, the network download was really slow. This time it took around 35-40 minutes to pull the update but once it was pulled down the deployment happened perfectly.

Most things on Silverblue should be installed via Flatpak or executed in a container via podman or docker. There were a few tools I decided to overlay onto the deployment. These packages were:

  • tmux – terminal multiplexer
  • weechat – console IRC client
  • rpmdevtools – mainly for rpmdev-extract

In fairness weechat these could all easily run via container, but to get up and going quickly I decided to overlay them for the time being. The most important one (for me) was rpmdevtools as there were a few packages which refused to overlay and my best move was to extract the contents (which were config files) and move them to the right locations in /etc. Not ideal, but not Silverblue’s fault.

Step 4: Install Editor

For this I decided to go with flatpak. First I needed to add the flathub remote which can be found here. Next I needed to add it as a remote:

$ sudo flatpak remote-add flathub /etc/flatpak/remotes.d/flathub.flatpakrepo

Then install my editor:

$ sudo flatpak install flathub com.visualstudio.code
Required runtime for com.visualstudio.code/x86_64/stable (runtime/org.freedesktop.Sdk/x86_64/1.6) found in remote flathub
Do you want to install it? [y/n]: y
Installing in system:
org.freedesktop.Sdk/x86_64/1.6 flathub fd7d657c9a36
org.freedesktop.Platform.VAAPI.Intel/x86_64/1.6 flathub 82006efc71d3
org.freedesktop.Platform.ffmpeg/x86_64/1.6 flathub d757f762489e
org.freedesktop.Sdk.Locale/x86_64/1.6 flathub 346dd3511a8c
com.visualstudio.code/x86_64/stable flathub 6cba55350228
 permissions: ipc, network, pulseaudio, x11, dri
 file access: host
 dbus access: org.freedesktop.Notifications, org.freedesktop.secrets
Is this ok [y/n]: y
Installing: org.freedesktop.Sdk/x86_64/1.6 from flathub
[####################] 17 delta parts, 148 loose fetched; 324907 KiB transferred in 35 seconds
Now at fd7d657c9a36.
Installing: org.freedesktop.Platform.VAAPI.Intel/x86_64/1.6 from flathub
[####################] 1 delta parts, 2 loose fetched; 2623 KiB transferred in 1 seconds
Now at 82006efc71d3.
Installing: org.freedesktop.Platform.ffmpeg/x86_64/1.6 from flathub
[####################] 1 delta parts, 2 loose fetched; 2652 KiB transferred in 1 seconds
Now at d757f762489e.
Installing: org.freedesktop.Sdk.Locale/x86_64/1.6 from flathub
[####################] 4 metadata, 1 content objects fetched; 14 KiB transferred in 0 seconds
Now at 346dd3511a8c.
Installing: com.visualstudio.code/x86_64/stable from flathub
[####################] Downloading: 94.7 MB/94.4 MB (3.6 MB/s) 
Now at 6cba55350228.

Lastly, verify it installed as expected:

$ flatpak run com.visualstudio.code

For the heck of it I also checked to see if it would add the program to the Gnome Menu and it was there!

My next steps will be getting some dev containers for languages I tend to use the most frequently.

Step 5: Be Happy

The end result is that I’m sitting here using Silverblue writing a blog post on setting up Silverblue. Was it 100% smooth with no issues? No, but it was smooth enough. The change should force me to start doing things I should already be doing in containers … in containers.

If you are interested in running on Silverblue as well I recommend giving it a shot. Take a gander at the main website and, if you’re ready to truly move your workflow to containers and flatpaks, join in!

flask-track-usage 2.0.0

flask-track-usage 2.0.0 has been released! Thanks to all who helped provide patches and test. Note: 2.0.0 is the recommended upgrade version from 1.1.0. 1.1.1 was released for those who are unable to make the needed changes to move to 2.x. You can check out the latest docs over at readthedocs.

The changes include:

  • MANIFEST.in: Add alembic to dist
  • CONTRIBUTORS: Add John Dupuy
  • py3: Fix import issue with summarization
  • .travis: Change mysql driver
  • test: Fix summerize tests for py3
  • travis: Add 3.6
  • docs: Quick fixes
  • README.md: Update docs to rtd
  • Use parens for multilines
  • Update versions to 2.0.0
  • sql: Increase ip_info from 128 to 1024
  • alembic: Upgrade ip_info from 128 to 1024
  • alembic: Support for upgrading SQL schema
  • sql: Create table if it is not present
  • couchdb: Add track_var and username
  • redis: Add track_var and username
  • Adding user_defined variable field to storage
  • Hooks: add new hooks system
  • test: Skip mongoengine if connection can not be made
  • storage: Rename to PrinterWriter
  • output: Add OutputWriter
  • storage: Create base class and Writer
  • requirements: Added six
  • Copyright now a range
  • Add CONTRIBUTORS
  • doc: Add note about py2 and 3
  • py3: Fix most obvious offenders
  • Move mongoengine ref in Travis CI config
  • Update Travis CI config to include mongoengine lib
  • pep8 fixes
  • MongoEngineStorage: updated docs; added get_usage
  • added testing
  • moved MongoEngineStorage to mongo.py
  • doc: Minor updates for a future release
  • Initial support for multiple storage backends
  • Update versions to denote moving towards 2.0.0
  • Added MongoEngineStorage code; adding test next.
  • docs: Update version to 1.1.1
  • release: v1.1.1
  • Updates for freegeoip function
  • test: Update sqlalchemy test for updated flask
  • test: Update mongo test for updated flask
  • test: test_data works with current Flask results
  • travis: Force pymongo version for travis
  • storage: Minor doc and structure updates for new backends.
  • Redis support
  • Added CouchDB integration. (#30)

flask-track-usage 2.0.0 testing

flask-track-usage is nearing a new milestone: 2.0.0. This new release will include a few bugfixes and a number of enhancements. The two that stick out are time aggregate functions in the form of hooks, split between Storage and Writer classes, and the ability to store custom date via a track_var global. Currently the work is being housed in a branch but will be updated and merged once 2.0.0 has a little time for testing. Some highlights in 2.0.0 include:

  • alembic: Support for upgrading SQL schema
  • sql: Create table if it is not pres
  • entcouchdb: Add track_var and username
  • redis: Add track_var and username
  • user_defined variable field to storage
  • Hooks: add new hooks system
  • test: Skip mongoengine if connection can not be made
  • storage: Rename to PrinterWriter
  • output: Add OutputWriter
  • storage: Create base class and Writer
  • requirements: Added six
  • doc: Add note about py2 and 3
  • freegeoip: Fix missing attribute
  • py3: Fix most obvious offenders
  • Move mongoengine ref in Travis CI config
  • Update Travis CI config to include mongoengine lib

Help test the 2.0.0 branch by cloning and installing in your development environment!

Spy DNA Pre Alpha Review

I love strategy games. I spend way too much time indulging in SRPGs, building empires in 4x games, trying to become the best trader in merchant style games, getting my squad out alive in tactical games, and clicking faster then other people in real-time strategy games. I recently got a pre-alpha copy of Shy Snake‘s Spy DNA to play around with. If you are not familiar with it, Spy DNA is a squad based tactical role playing game that prides itself with being grounded in real life mechanics. If you want some examples think Syndicate or X-COM but with a more free moving system rather than turn movement.

The Demo

main

The pre-alpha demo provides two previews of game play. The first being Crolimax Lab and the second being the outdoor combat demo.

Crolimax Lab

intro
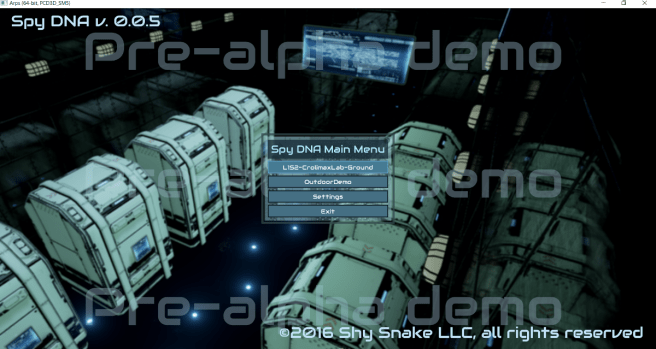
The lab demo takes you through a bit of the story. I talked with a number of folks working at the lab and learn what the lab is for, the history of the organization, and what I would be doing for them. I ended up using this area to get used to the controls. One thing that got me over and over was the camera movement. I kept wanting to use WASD to move the camera with Q and E to rotate. I’m not sure why I kept gravitating towards those bindings but, for me, they would make more sense than the arrow keys. In any case I’m sure Shy Snake will either add similar bindings or will be able to explain why the arrow keys make more sense for Spy DNA.

It was during this demo I noticed the bottom left camera. This is known as the “body cam” and is quite interesting and useful. As the squad member moves around you can watch their movement from their point of view. This is helpful for when you want to make sure you are covered or verify you have a clear line of site while still keeping your eye on the over all tactical view of the theater.

Outdoor Combat Demo

fight
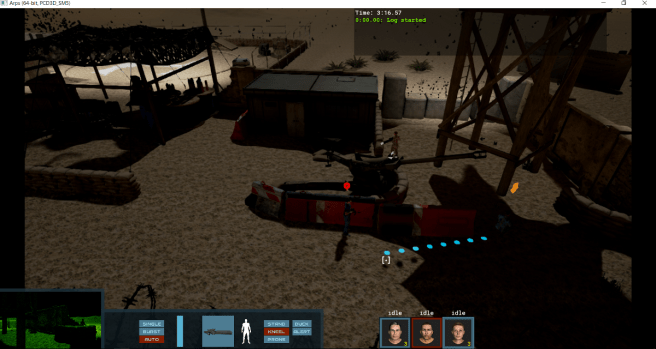
In the outdoor combat demo you get a three member squad and are faced with an encampment of enemies keeping patrol. For some reason one of the members always started far off the screen, but this is pre-alpha after all! In any case, this is where the fun really begins! I was able to sneak in and around a few guards before needing to start taking out some of them. By default you move quickly from point to point but, by clicking and holding, you can change how you traverse terrain allowing for sneaking and other options.
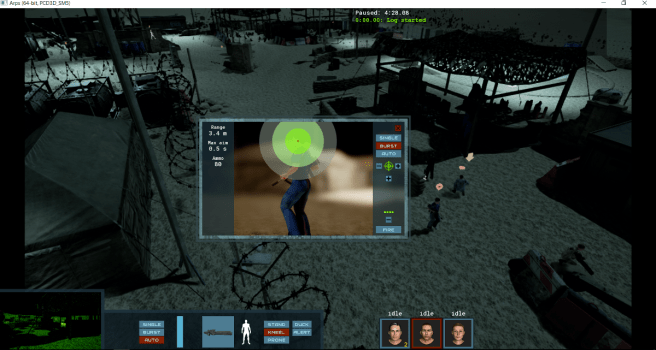
As I played I picked up the mechanics around the sight cam. At first I misinterpreted what I was seeing and didn’t understand why I kept missing almost every shot but after a few more tries it became clear how it works (and it totally makes sense).

aim

The pre-alpha manual states that the innermost green circle is where 50% of shots will land, the yellow circle is where 90% will land, and the outermost where 99% of shots will land. You can tweak the shot making the entire circle larger or smaller, move it around the target, select the type of shot you want to take (from single shot, burst, and auto “spray and pray”), as well as the amount of bullets to be used.

Following the realistic vibe you don’t have infinite anything and landing a shot causes real damage. There are no over the top 40 shot kills here and it’s a breath of fresh air!

One thing I found myself doing a lot was making use of the pause. I think this is due to how many other games in the past relied on turn based movement and my brain wanting to keep trying to fit Spy DNA into that pattern. With a full manual or tutorial map and a little practice I believe I could really get into the more free movement system. Until then I can’t stop myself from wanting to use pause.

Conclusion

Obviously, being pre-alpha, there were a decent amount of bugs present (mainly camera placement/control related) but the basic ideas came through and came through well. Many people who enjoy games like Jagged Alliance or Silent Storm are still playing them as the AAA or indie game industries have not really kept up with the game style. It’s a pity as well as tactical games can be very rewarding. Spy DNA feels like it could become a very refreshing entry into a genre which needs a revival.

Programmatic Ansible Middle Ground


Forward

About a year ago serversforhackers posted a great article on how to run Ansible programamatically  Since then Ansible has had a major release which introduced changes within the Python API.

Simulating The CLI

Not that long ago Jason  DeTiberus and I were talking about how to use Ansible from within other Python packages. One of the things he said was that it should be possible to reuse the command line code instead of the internal API if you hook into the right place. I finally had some time to take a look and it seems he’s right!

If you took a look at the 2.0 API you’ll see there is a lot more power handed over to you as the developer but with that comes a lot of code. Code that for many will be nearly copy/paste style code directly from command-line interface code. So when there is not a need for the extra power why not just reuse code that already exists?

import os  # Used for expanding paths

from ansible.cli.playbook import PlaybookCLI
from ansible.errors import AnsibleOptionsError, AnsibleParserError

def execute_playbook(playbook, hosts, args=[]):
    """
    :param playbook: Full path to the playbook to execute.
    :type playbook: str
    :param hosts: A host or hosts to target the playbook against.
    :type hosts: str, list, or tuple
    :param args: Other arguments to pass to the run.
    :type args: list
    :returns: The TaskQueueHandler for the run.
    :rtype: ansible.executor.task_queue_manager.TaskQueueManager.
    """
    # Set hosts args up right for the ansible parser. It likes to have trailing ,'s
    if isinstance(hosts, basestring):
        hosts = hosts + ','
    elif hasattr(hosts, '__iter__'):
        hosts = ','.join(hosts) + ','
    else:
        raise AnsibleParserError('Can not parse hosts of type {}'.format(
            type(hosts)))

    # Create the cli object
    cli_args = ['playbook'] + args + ['-i', hosts, os.path.realpath(playbook)]
    print('Executing: {}'.format(' '.join(cli_args)))
    cli = PlaybookCLI(cli_args)
    # Parse args and run it
    try:
        cli.parse()
        # Return the result:
        # 0: Success
        # 1: "Error"
        # 2: Host failed
        # 3: Unreachable
        # 4: Parser Error
        # 5: Options error
        return cli.run()
    except (AnsibleParserError, AnsibleOptionsError) as error:
        print('{}: {}'.format(type(error), error))
        raise error


Breaking It Down

The function starts off with some hosts parsing. This is not really needed but it does make the function easier to work with. On the command line Ansible likes to have a comma at the end of hosts passed in. This chunk of code makes sure that if a list or string is given for a host that the resulting host string is properly formatted.

    # Set hosts args up right for the ansible parser. It likes to have trailing ,'s
    if isinstance(hosts, basestring):
        hosts = hosts + ','
    elif hasattr(hosts, '__iter__'):
        hosts = ','.join(hosts) + ','
    else:
        raise AnsibleParserError('Can not parse hosts of type {}'.format(type(hosts)))

The Real Code

This chunk of code is what is actually calling Ansible. It creates the command line argument list, creates a PlaybookCLI instance, has it parsed, and then executes the playbook.

    # Create the cli object
    cli_args = ['playbook'] + args + ['-i', hosts, os.path.realpath(playbook)]
    print('Executing: {}'.format(' '.join(cli_args)))
    cli = PlaybookCLI(cli_args)
    # Parse args and run it
    try:
        cli.parse()
        # Return the result:
        # 0: Success
        # 1: "Error"
        # 2: Host failed
        # 3: Unreachable
        # 4: Parser Error
        # 5: Options error
        return cli.run()
    except (AnsibleParserError, AnsibleOptionsError) as error:
        print('{}: {}'.format(type(error), error))
        raise error

Using The Function

# Execute /tmp/test.yaml with 2 hosts
result = execute_playbook('/tmp/test.yaml', ['192.168.152.100', '192.168.152.101'])

# Execute /tmp/test.yaml with 1 host and add the -v flag
result = execute_playbook('/tmp/test.yaml', '192.168.152.101', ['-v'])

Intercepting The Output

One drawback of using the command-line interface code directly is that the output is expected to go to the user in the standard way. That is to say, it’s sent to the screen and colorized. This will probably be fine for some, but others may want to grab the output and use it in some form. While it is possible to change output through the configuration options it is also possible to monkey patch display and intercept the output for your own use cases. As an example, here is a Display class which forwards all output that is not meant for the screen only to our logging.info method.

# MONKEY PATCH to catch output. This must happen at the start of the code!
import logging

from ansible.utils.display import Display

# Set up our logging
logger = logging.getLogger('transport')
logger.setLevel(logging.INFO)
handler = logging.StreamHandler()
handler.formatter = logging.Formatter('%(name)s - %(message)s')
logger.addHandler(handler)

class LogForward(Display):
    """
    Quick hack of a log forwarder
    """

    def display(self, msg, screen_only=None, *args, **kwargs):
        """
        Pass display data to the logger.
        :param msg: The message to log.
        :type msg: str
        :param args: All other non-keyword arguments.
        :type args: list
        :param kwargs: All other keyword arguments.
        :type kwargs: dict
        """
        # Ignore if it is screen only output
        if screen_only:
            return
        logging.getLogger('transport').info(msg)

    # Forward it all to display
    info = display
    warning = display
    error = display
    # Ignore debug
    debug = lambda s, *a, **k: True

# By simply setting display Ansible will slurp it in as the display instance
display = LogForward()
# END MONKEY PATCH. Add code after this line.

Putting It All Together

If you want to use it all together it should look like this:

# MONKEY PATCH to catch output. This must happen at the start of the code!
import logging

from ansible.utils.display import Display

# Set up our logging
logger = logging.getLogger('transport')
logger.setLevel(logging.INFO)
handler = logging.StreamHandler()
handler.formatter = logging.Formatter('%(name)s - %(message)s')
logger.addHandler(handler)

class LogForward(Display):
    """
    Quick hack of a log forwarder
    """

    def display(self, msg, screen_only=None, *args, **kwargs):
        """
        Pass display data to the logger.
        :param msg: The message to log.
        :type msg: str
        :param args: All other non-keyword arguments.
        :type args: list
        :param kwargs: All other keyword arguments.
        :type kwargs: dict
        """
        # Ignore if it is screen only output
        if screen_only:
            return
        logging.getLogger('transport').info(msg)

    # Forward it all to display
    info = display
    warning = display
    error = display
    # Ignore debug
    debug = lambda s, *a, **k: True

# By simply setting display Ansible will slurp it in as the display instance
display = LogForward()
# END MONKEY PATCH. Add code after this line.

import os  # Used for expanding paths

from ansible.cli.playbook import PlaybookCLI
from ansible.errors import AnsibleOptionsError, AnsibleParserError

def execute_playbook(playbook, hosts, args=[]):
    """
    :param playbook: Full path to the playbook to execute.
    :type playbook: str
    :param hosts: A host or hosts to target the playbook against.
    :type hosts: str, list, or tuple
    :param args: Other arguments to pass to the run.
    :type args: list
    :returns: The TaskQueueHandler for the run.
    :rtype: ansible.executor.task_queue_manager.TaskQueueManager.
    """
    # Set hosts args up right for the ansible parser. It likes to have trailing ,'s
    if isinstance(hosts, basestring):
        hosts = hosts + ','
    elif hasattr(hosts, '__iter__'):
        hosts = ','.join(hosts) + ','
    else:
        raise AnsibleParserError('Can not parse hosts of type {}'.format(
            type(hosts)))

    # Create the cli object
    cli_args = ['playbook'] + args + ['-i', hosts, os.path.realpath(playbook)]
    logger.info('Executing: {}'.format(' '.join(cli_args)))
    cli = PlaybookCLI(cli_args)
    # Parse args and run it
    try:
        cli.parse()
        # Return the result:
        # 0: Success
        # 1: "Error"
        # 2: Host failed
        # 3: Unreachable
        # 4: Parser Error
        # 5: Options error
        return cli.run()
    except (AnsibleParserError, AnsibleOptionsError) as error:
        logger.error('{}: {}'.format(type(error), error))
        raise error


Pros and Cons

Of course nothing is without drawbacks. Here are some negatives with this method:

  • No direct access to “TaskQueueManager“
  • If the CLI changes the code must change
  • Monkey patching …. ewww

But the positives seem to be worth it so far:

  • You don’t have to deal with “TaskQueueManager“ and all of the construction code
  • The CLI doesn’t seem to change often
  • The same commands one would run on the CLI can easily be extrapolated and even run manually

DC Rebirth Hopes

I’m really excited that the “legacy” is coming back to DC comics. For the past few years reading DC has felt sort of sterile and, because of that, I’ve cut down my DC reading to just a few titles I follow through the good and bad times. But I have some hope this change will bring back what seems to have been lost through the New 52. Here are a few wants (probably more like dreams…) I have for the reboot that isn’t a reboot.

I’m going to focus on my favorite area of the DC universe: The Green Lanterns. As far as I know there isn’t a term for the Green Lanterns of Earth other than saying ‘Earth Lanterns’. Since the New 52 we’ve been introduced to a few new Lanterns or Lantern like characters. However, we’ve also lost a few who were at least mild heroes and villains before Flashpoint and I believe having them back would add interesting elements to the GL books.

Obsidian

obsidian02Since Alan Scott was reimagined as a homosexual DC removed his children from existence. Ignoring that Scott could still have adopted children or had children in a previous relationship, Obsidian went from being Scott’s child who happened to be gay to something different entirely. According to the Wikipedia page the Obsidian I know and love returned in Convergence. However, Convergence was not the best story and I ended up skipping all but the main story which wasn’t so compelling either. Here is hoping that Obsidian is back and gets some focus within the Rebirth.

Jade

green_lantern_jadeAnother child of the original Alan Scott, Jade seems to be missing from the New 52. It’s possible she exists but I haven’t read any books with her in any capacity but I have a feeling she was removed or, at the very least, down played to near non-existence. When I was getting back into comics as an adult Jade and her brother had at least major-minor character status in JSA and other books. I have a bad feeling that, since we have Power Ring maybe there isn’t the same space for Jade to occupy: A female with similar GL powers but not exactly a Lantern. Here is hoping I’m wrong!

Sodam Yat

sodam_yat_ion
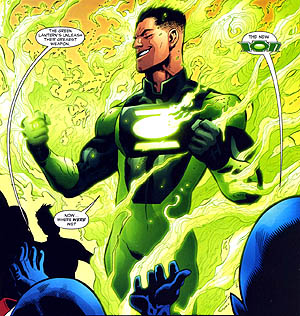
Prophesied to be the last of the Green Lanterns in the future, and an important host to Ion, Sodam Yat has been pretty boring in The New 52. Pre Flashpoint he had created some kind of offshoot of the Lanterns where his own people, the Daxamites, follow him towards being less xenophobic. Heck, I thought we were seeing the birth of a new Lantern Corps that would less spectrum based and closer to a religion. An intriguing story line which seems to have been largely left dangling. In the previous universes he was one of my favorite characters.

Hank Henshaw

hank-henshawAlso known as Cyborg Superman. You remember, one of the 4 Supermen that came to be after Superman “died”. Hank is one of the more interesting thorns in the Lanterns side yet has been pretty absent since the reboot even though he does exist in some form. I would love to have the emotionally upset and misunderstood Henshaw back. The man who who led the Alpha Lanterns and Manhunters trying to find his humanity (or lack of it) among the stars. There’s just something about the character that, when he emerges from the shadows in an arc, adds credibility and strings back in history to the story.

Hal Jordan

Ok, yeah, he was there through the New 52 but for at least a third of it he sure didn’t look, sound, or feel like Hal. I mean, look at this guy:

l3rnutb
That is Hal Jordan. Really.


I’m hoping we get Hal back. Don’t get me wrong, it’s fine to try new things and take characters in different directions but what was done with Hal in the later New 52 just didn’t work in my opinion.

Blue Beetle

While not directly a Green Lantern character, Jaime Reyes as the Blue Beetle with the history of past Blue Beetles is something I have missed. Jaime is my favorite Blue Beetle, mainly because he was the first o5099548-4122363971-tumbl
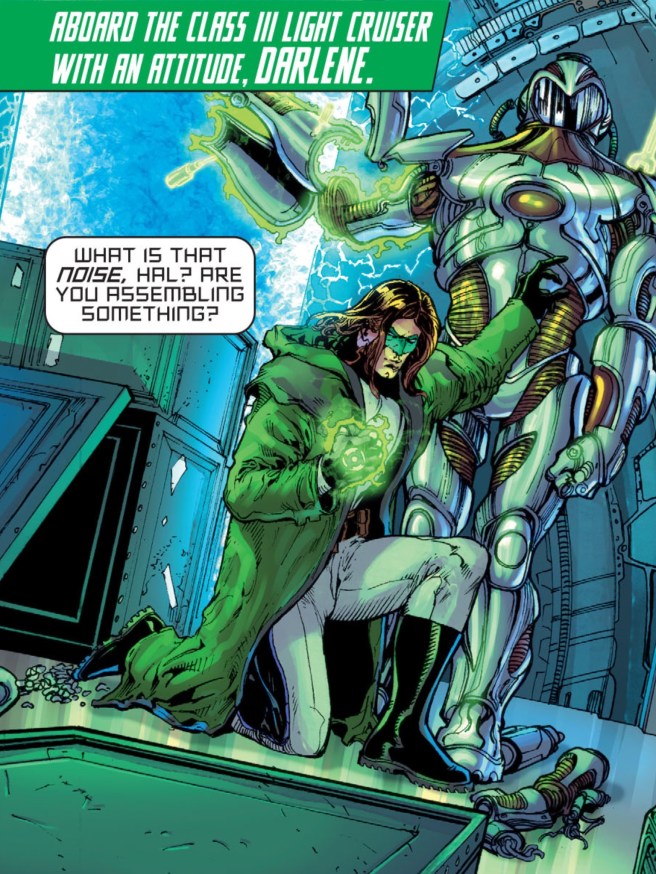
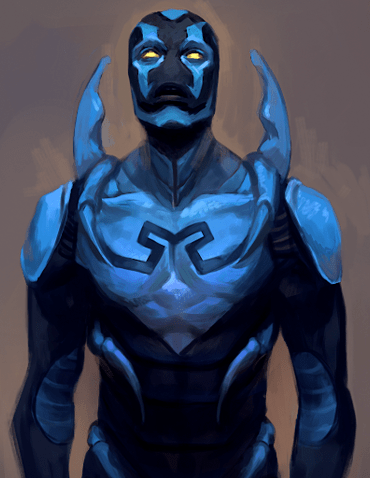
ne I really took notice of, but without having a legacy to stand on his character is a bit boring. Not only that, but in the past the scarab has been noted as a weapon of the Reach (an enemy of The Guardians of the Universe). There has been some development around that in the New 52 as well as pre-Flashpoint but it seems like there is still a lot of stories that could be told to round out the Reach, Blue Beetle, Black Beetle, The Guardians of the Universe, The Controllers, and the Lantern forces.


So…

By this point Rebirth is has been running for a bit. I’ve purposefully been holding back from reading my issues so I can immerse myself in the rebirth story line in hopes it brings back the spark.

What is it you hope Rebirth will bring?